|  |
| Main Page |  |
How to measure hardwareMeasuring leather craft hardware is very easy to do - and very easy to do wrong. We'll help you get it right to be sure you get the size you need. Here we will cover: | |
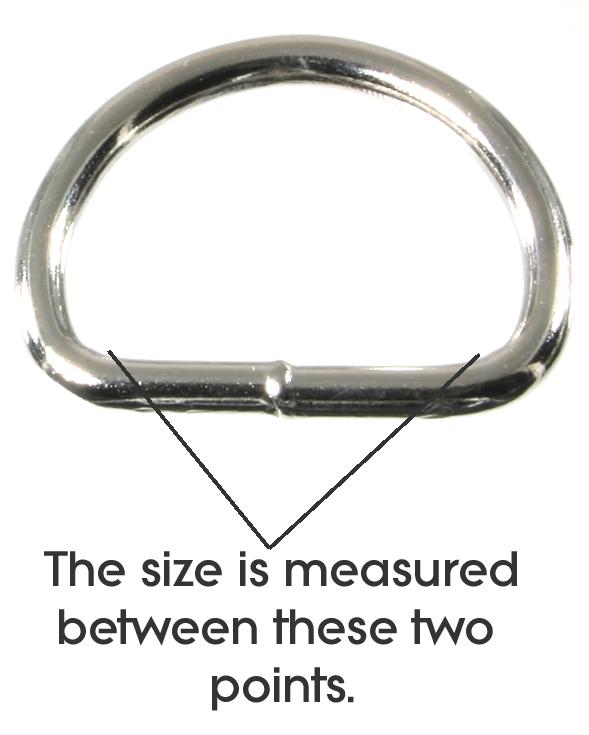
| Click any for a larger image | Measuring D RingsD rings are measured by their base width. More importantly, you need a D ring that is the same size of the material or leather which you want to put in the D ring. If you have a 1" strap, you need a 1" D ring. |
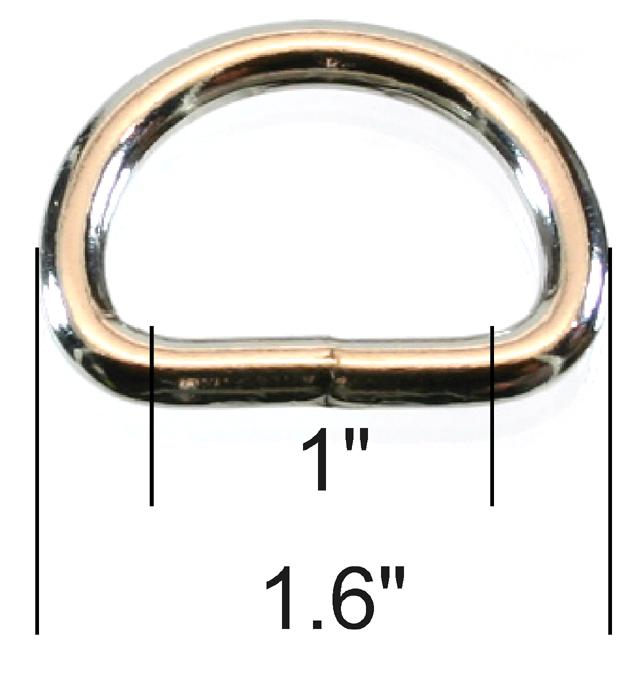 | One of the reasons people get confused when they take a ruler to a D ring and then say it is the wrong size is this: It makes a lot of difference if the D rings is made of heavy or thin material. This, on your left, for example is our heavy welded D ring. It measures 1.6" on the outside. |
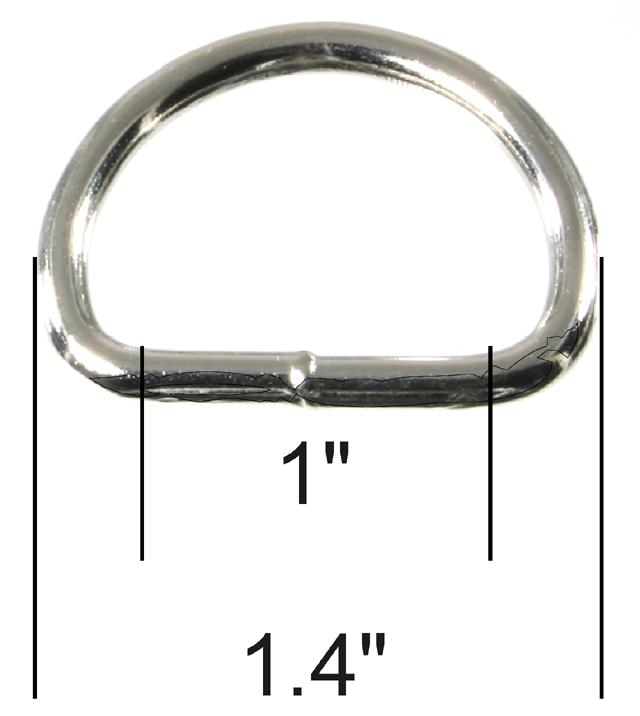 | Now look at this one. It is one of our lightweight welded D rings. It is fully 2/10 of an inch smaller on the outside than the heavy one, yet it is, still, a 1" D ring. |
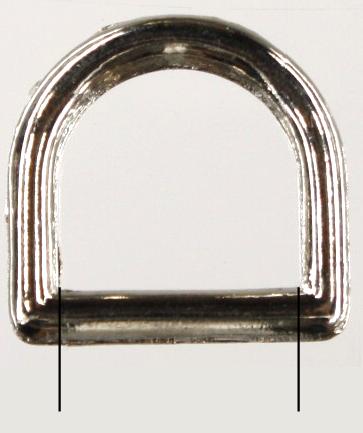 | Cast D rings don't have the curve, so they are much easier to measure with total accuracy. Just measure the inside. So the bottom line is, don't play around with measuring D rings if you are building something, measure your material then just get the same size D. So what if you have the D rings and want to know the correct width to make your material? Here the best bet is to get a caliper. If you don't have one, you can pick up cheap plastic ones (we have them all over the place) for around two bucks. If you only have to do this once, get a ruler or tape measure that starts at 0. I know that sounds funny, but many rulers have a little gap between the printing and the end of the ruler. That's going to be hard to use. In either case, caliper or ruler, you want to measure the flat section of the D in wire-formed rings because of the curve. Notice in our images, the lines measuring the size of the D ring are not at the very edge of the base. You measure only the flat section. For cast rings, just measure the inside. |
Measuring BucklesBuckles are way easier to measure, let's take a quick look. | |
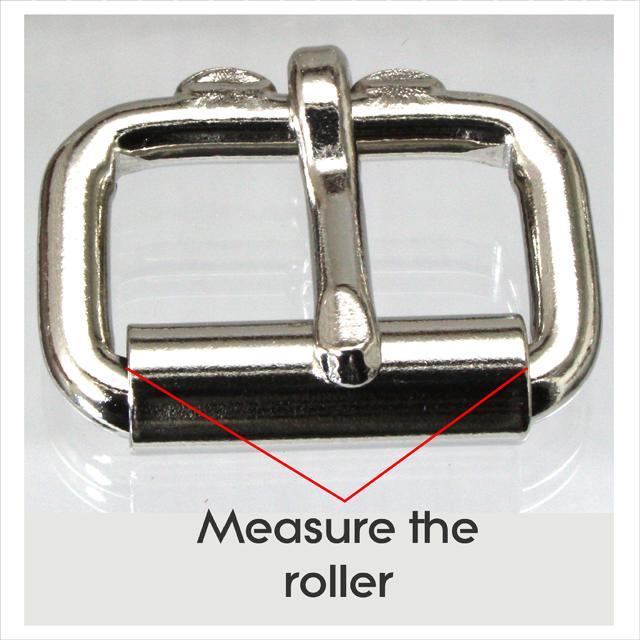 | Roller bucklesMeasure a roller buckle by simply measuring the width of the roller. Many (most of ours) are a tiny bit bigger than the actual size, by maybe 1/64 of an inch. That makes sure that you get full coverage for your material. |
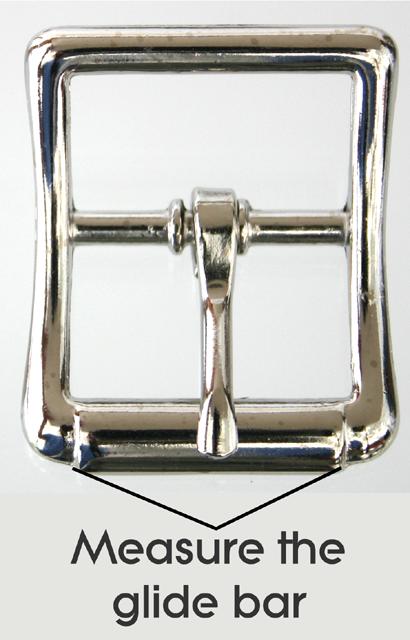 | Gllide bar bucklesAgain, very simple, measure the width of the raised section on the buckle - the glide pad. |
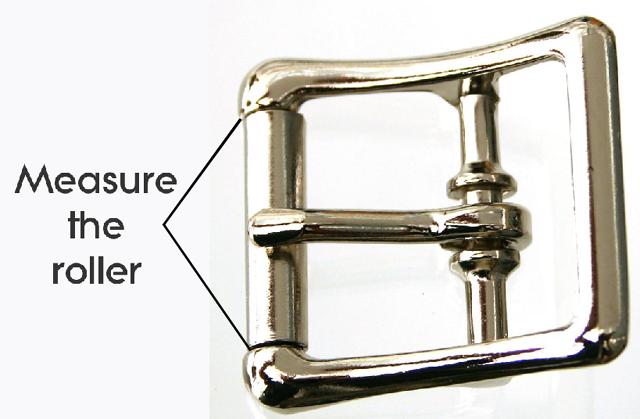 | Center bar roller bucklesJust like its big brother the heel bar roller buckle - just measure the roller. |
Measuring O ringsO rings are easy to measure, but a lot of people do it wrong - we'll straighten that out. Then we're going to throw you a curve-ball. Sometimes, actually often, you don't want to buy the same size as your material. | |
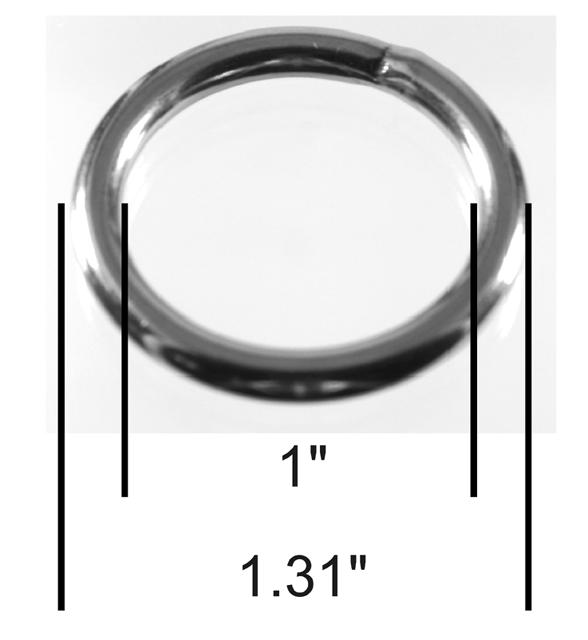 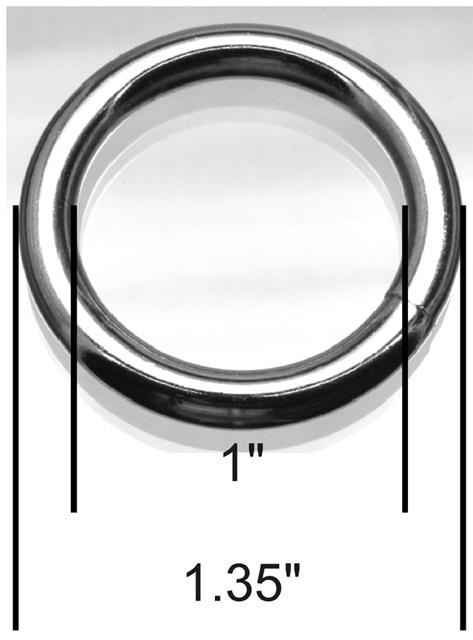 | To properly measure O rings, just measure the inside. Many people incorrectly measure the outside. On a small O ring like this, it is a tiny difference (this shows our nickel plated and our stainless steel 1" O ring), but move up to a 2 inch or larger O ring, and they are thicker, and the difference will be greater. The outside measurement of an O ring simply doesn't exist in defining hardware. There are only two measurements, one, the inside size, and secondly the thickness of the material - the size of the wire used to make it. What if you need an O ring of a specific outside size? Well, you can do the math and figure out what it will be, but don't be surprised if there isn't an O ring that matches what you need. As we said, as far as the manufacturing of O rings go, the outsize size is completely ignored. So you want to try to get close to the correct outside size? Here's how you do it. All of our O rings have two sizes listed, the inside measurement (called the ID) and the size of the wire, expressed in millimeters. Simple math - with the help of a search engine. Find a millimeter to inch conversion calculator on the net, and first punch in the size of the wire - you'll get an odd fraction. Let's do the bottom one: This is described as a 1 inch 4.5mm ring. Run to the calculator and punch in 4.5, you'll get .177165 You need to double that, as it is the same on both "sides", so the answer is: 1+.177165+.177165 which equals 1.35433 If you're like me and quickly converting to fractions just isn't going to happen in my head, you start playing with a calculator and discover that 3/8" is (3 divided by 8) .375 so the ring is a little smaller than 1 3/8". Want closer? Try a 16th less. 5/16" is .3125 - whoops, its bigger than 1 5/16". And therein lies the problem, until you get to 1/128 of an inch you probably won't find an even fraction. Unfortunately, we can't help you find an O ring with an outside dimension of exactly 1" (or any other size), but you can get close by doing the math. So now comes the curve ball. You will often want an O ring that is bigger than the material you are using. Especially if you are going to put more than one thing in the O ring. Hopefully we can show you how to deal with the situation, and give you some ideas how to arrive at the correct size. The best way for us to explain this is with photos. Here we are trying to decide what size ring to use for a 1" piece of leather in three different situations. |
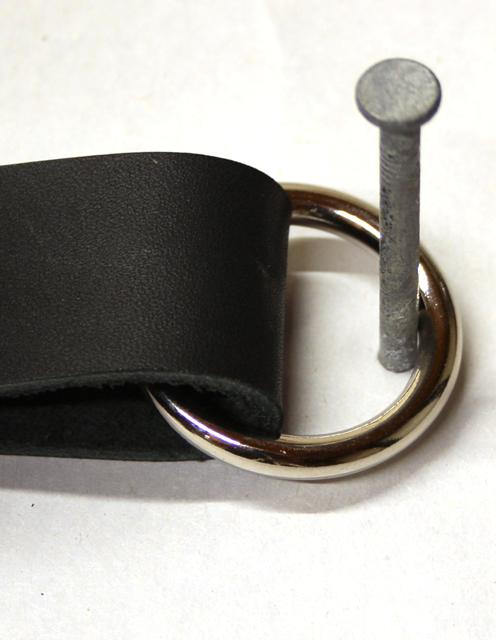 | Excuse the nail - no helper to hold the ring! So the 1" leather fits in a 1" ring, as it should, but aesthetically does it look good? |
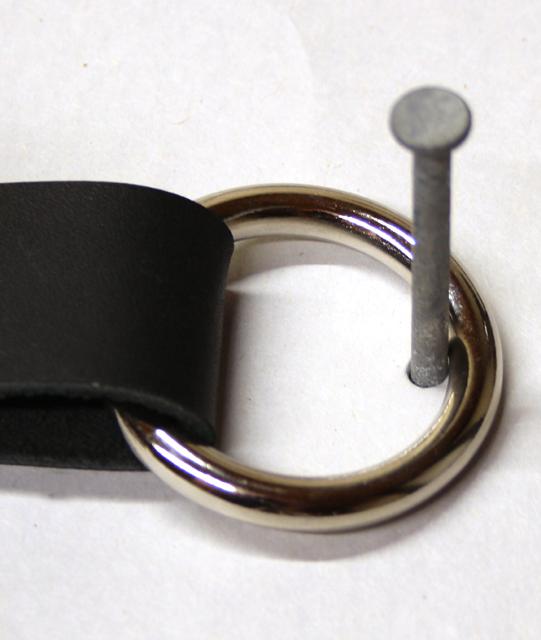 | Does it look better to you in a 1 1/4" ring? To us it does, but what about... |
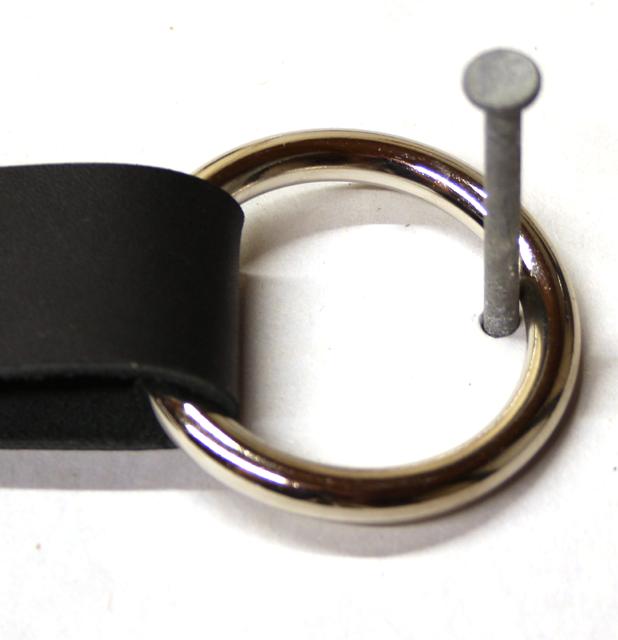 | a 1 1/2" ring? |
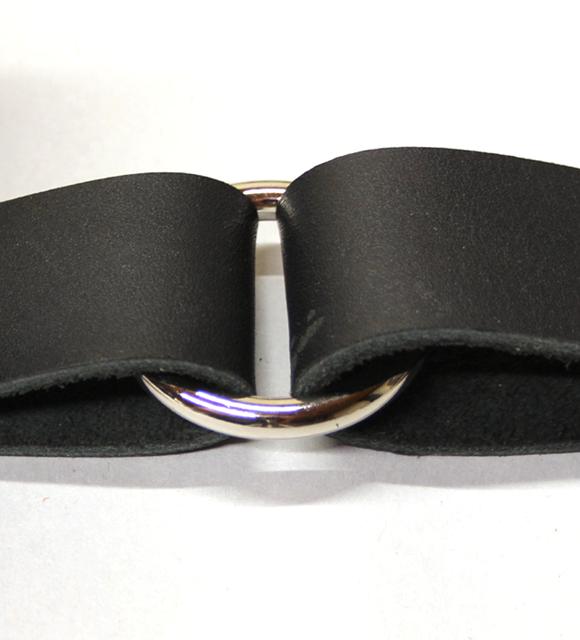 | Now what if we wanted to put 2 pieces of material in the ring? Personally, this doesn't look great in a 1" ring. |
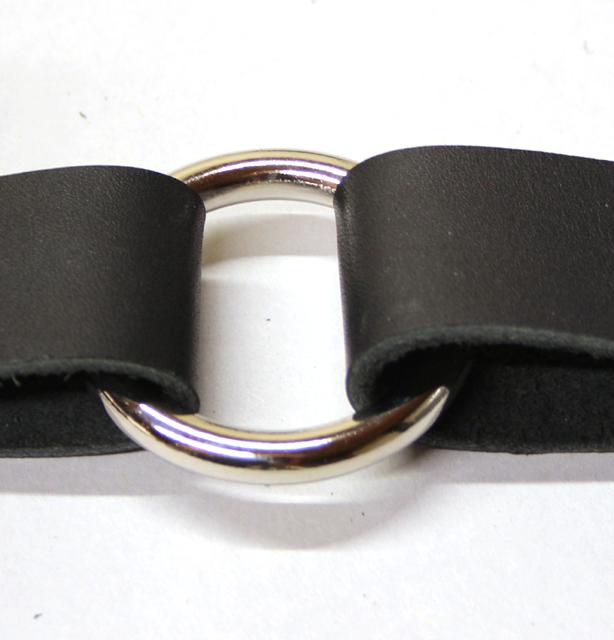 | To us, this absolutely looks better - in a 1 1/4" ring. |
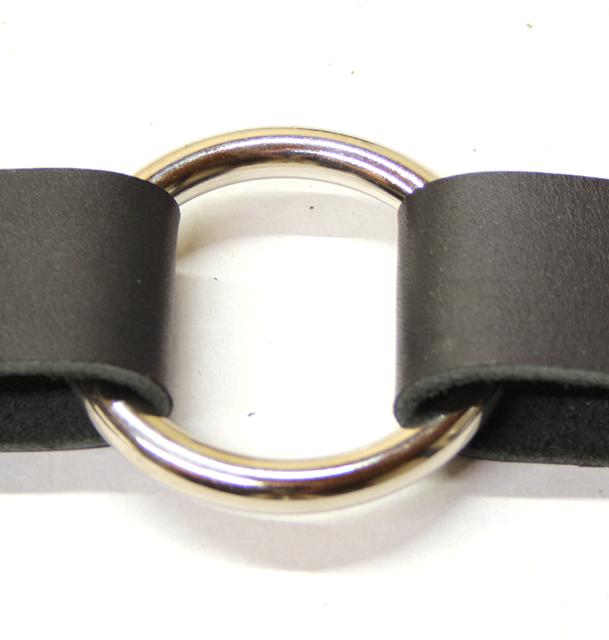 | This looks pretty decent also - in a 1 1/2" ring. All a matter of taste. |
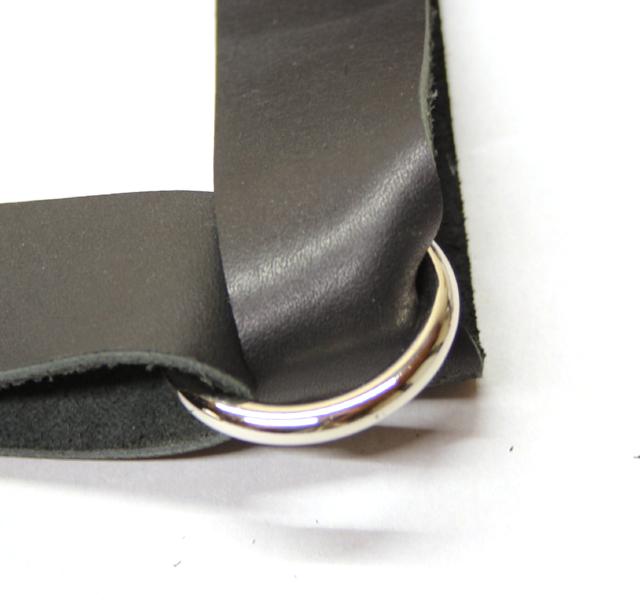 | What about 2 at right angles? Well, the 1" sure isn't going to work. |
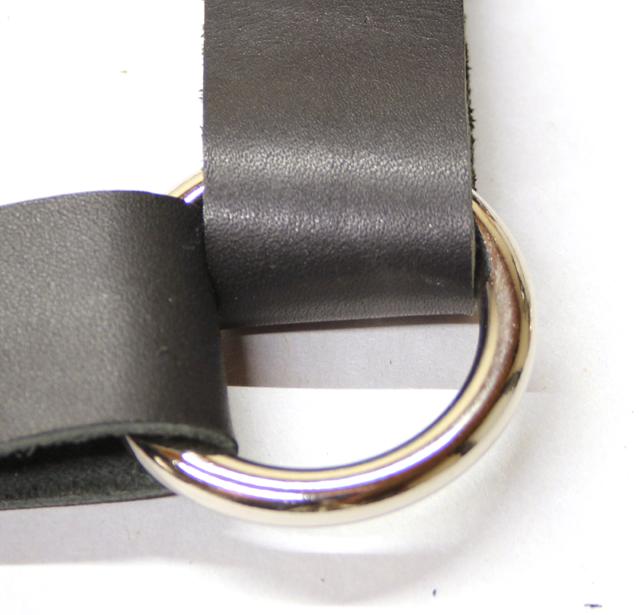 | Better in a 1 1/4", but they still hit. |
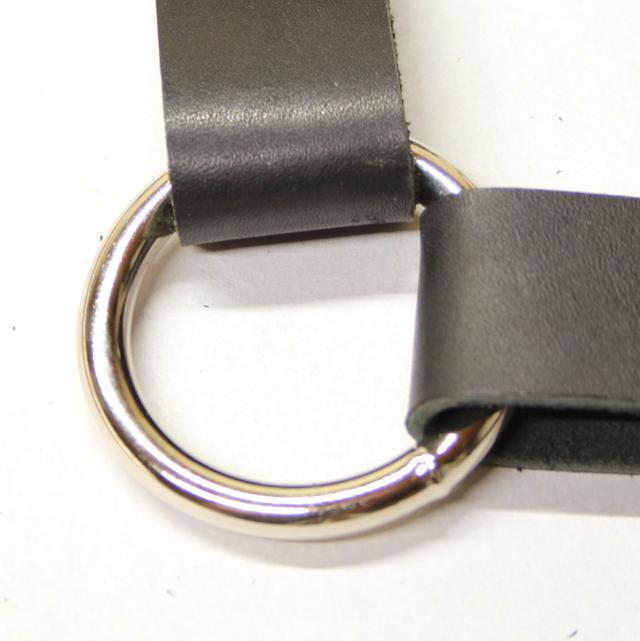 | Now that's a heck of a lot better - a 1 1/2" ring. So how does one decide without buying a whole lot of test rings? One is by math. Get out your search engine and look up "circumference calculator". This works especially well for the right angle one. Here's what we discover: 1" has a circumference of 3.1" So seeing that your material is 1" wide and you want it to fit in one quarter of the ring... 1/4 of 3.1=.77 - nope |
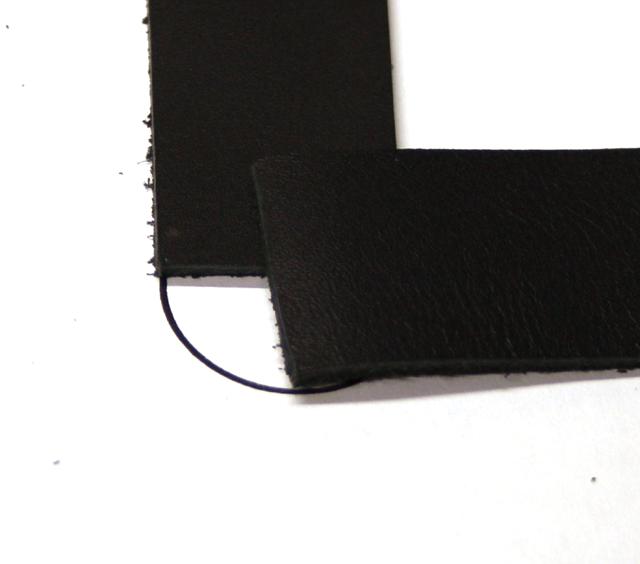 | Math not the best way for you? Then circles on a piece of paper. Here's trying to put two 1" pieces of material in a 1" circle. Clearly not going to happen! |
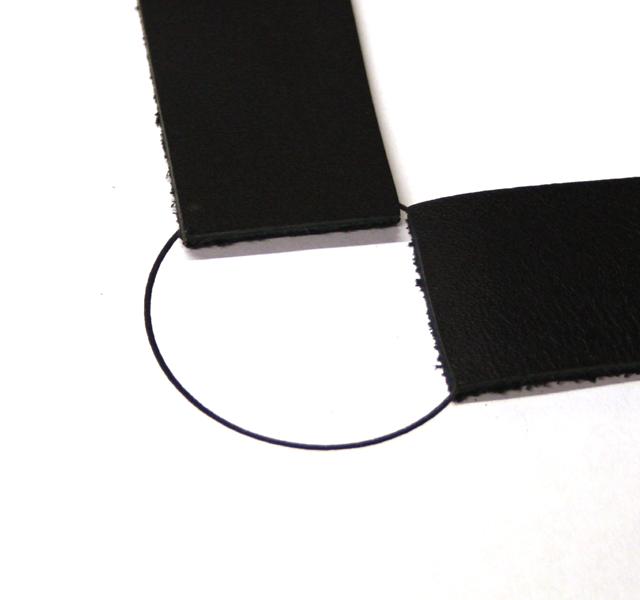 | Skipping to the 1 1/2" circle, we can see that they will lay neatly in that circle - and now you have the right size ring. This is a trick we have used in the production side often. Even though we have thousands of rings we can play with, keeping a sheet of paper around with different size circles is often the best way to, at the least, get close on the first try. Therefore, sizing hardware is really simple until it comes down to O rings. A combination of possible/impossible and personal taste is what is going to be the bottom line. There is no right and wrong like with buckles, just trial and decisions. |
Other informational pages we hope you will find helpful: Explain the different D rings styles | |